Monday, May 29, 2017
HOW TO HIDE YOUR CONTACT MESSAGE FROM FRIENDS EASILY
HOW TO HIDE YOUR CONTACT MESSAGE FROM FRIENDS EASILY
Go to link download
Sunday, May 28, 2017
Download WhatsApp PLUS APK for your Android HTCHD2
Download WhatsApp PLUS APK for your Android HTCHD2
When we talk of the most powerful messengers across the platforms, then we come across the messaging apps like BBM for Blackberry and WhatsApp for Android. Unfortunately for all Blackberry boys and Android users, BBM for Android seems to be a distant reality as of now but for all those who wanted to enhance their WhatsApp experience can now try out the latest customized version of WhatsApp dubbed as “WhatsApp PLUS” which comes with an undoubted enhanced user experience smudged in the ICS theme packed with added list of features which we have mentioned below.
Please note that this is still in the testing state and is an unofficial version. Though it’s a Rock Solid app with almost “Zero” bugs, it can now be installed right in your Android without having to bother about the current Android version as it supports virtually all the Android OS versions. There is no timeline for the official release of WhatsApp Plus but as long as you are getting to try this one out, there shouldn’t be any issues. For your convenience, we have also shown the screen captures on how this one looks like with added features. Full credits to the XDA recognized developer rafalense for coming up with this update.

Features of WhatsApp PLUS:
- ‘PLUS theme’ option added. Change icons and images distribution to make WhatsApp more functional
- Chat Bubbles color now can be changed
- Stock round chat bubbles can be changed to square ones
- Headers color option added too (for Chats, Contacts and Conversation screens)
- Added option to discard annoying update message when opening WhatsApp (for the ones who suffer of it)
- “online”, “typing” and “last seen…” MODs are back
- Added transparency control for bubbles in Chat screen
- Added color mod for status icons in Chat screen (clock, check and double-check icons)
- Now inside Conversation Colors, Header and Chat MODs sepparated for a better comprehension
- Download Whats App PLUS APK file to your computer. Once downloaded, connect your Android device to the computer to place this APK file in your device. Alternatively, you can also directly install this APK file in your device directly.
- If connected to computer, disconnect the device and with the help of File explorer navigate to the path where you have placed this APK file in your device and open the same to install the same in your Android device.
- All you need to do is to just follow the on screen instructions. As soon as the installation is completed, you will be prompted to tap on “Accept” button. Please note that just in case if it prompts you to select the option of “Unknown Sources” then you need to select the same.
Go to link download
Thursday, May 25, 2017
HOW TO USE WHATSAPP WITHOUT USING YOUR OWN NUMBER OR WITH USA NUMBER
HOW TO USE WHATSAPP WITHOUT USING YOUR OWN NUMBER OR WITH USA NUMBER
WhatsApp through which you can use
WhatsApp without your own mobile number.
Yes, you read it right. Now its too easy to use
WhatsApp without any number and its working
fabulously.
Trick is personally tested by me
and its working fine. Here we are going to use
Voxox application to get success in this trick.
Most of you might already know about Voxox
application which helps us to call anyone using
any other number.
Steps to Follow:
1) Download & install Voxox app from Here .
2) Once you download, create new account.
3) Now goto " More " tab, there you will find
your Voxox number, just note it down.
4) Now start WhatsApp and enter Voxox
number at the time of verification.
5) Finally, You will get a notification after
putting the number,Just click on that and you
will redirected to Whatsapp.(if msg is not come then
Open your registered id . and here you will findvovox mail open it then you wil get whatsapp otp)
Bravo !! You did it !! Now enjoy WhatsApp
without using your own number.
Go to link download
Saturday, May 20, 2017
Call your friend with his own number Call Spoofing
Call your friend with his own number Call Spoofing

On Internet you will get various Free and Paid Call Spoofing Services, One of them we have tested and going to Demonstrate here. A website called "Crazycall.net" is giving to service to do Free Spoofed Calls in any Country Free of Cost and Yes it is as much easy as to prepare sandwich.
Steps to Do Spoofed Call :
1.) Open Crazycall.net and Select Country where you want to call.

2.) Enter Number A = The Fake number you want to Display to Victim
3.) Enter Number B = Victims Number
4.) Now Click "Get me a Code" . Done !
5.) On right side of page you will get A mobile number + Five Digit Unique Code.

6.) Now do a call from another number (say Number C) on Given number in Step 5.
7.) It will ask you to Enter the Code, that you get in Step 5.
8.) Done ! The Victim with Number B will Get a Call from Fake number A, Even you are using Number C for calling.
Remember, This is an ISD call and ISD call charges will be applied. Dont blame us.
Enjoy Hacking. Dont misuse it.
Go to link download
Friday, May 19, 2017
HOW TO GET THOUSANDS OF LIKES ON YOUR FACEBOOK STATUS UPDATES IN 2013
HOW TO GET THOUSANDS OF LIKES ON YOUR FACEBOOK STATUS UPDATES IN 2013
The topic attracted you, Right? Yea its 100%
Real. Sometimes when you Check a Status from
some people, You see over 100+ Likes or More,
IBjTechBlog is gonna show you how to get tons
of likes on your facebook status . .it is very
akward when you update your status on facebook
and you dont have any like not to even talk of
comment
Sometimes you wish to Post something and have
a Huge number of Like but it just wont happen,
No more panic here is a simply step to get as
many likes as you want on your facebook Status
update, Just follow the Simple Steps below.
HOW TO GET THOUSANDS OF LIKES ON YOUR
FACEBOOK UPDATES
1. Visit www.likelo.com , after opening the page
you will see a link tagged "CLICK HERE", click on
it, then click on the "allow" button to Authorise
the application called Xperia on your facebook
account.
2. After performing the First Step, You will see a
success page, Then click on "the Install" button
at the top of the Page, Now press #7 if you are
using a operamini to view the success page
address , if you are using other browsers just
copy out the url, The URL will look like this:-
e.g
https://www.facebook.com/connect/
login_success.html#access_token=
AAABempp6Ls0BAAYyHK&expires_in=0
3. Just copy it, Then go back to the Likelo
website Homepage, Scroll down the Page, you will
see a box, Paste the url address youve just
copied there then click submit.
You will be taken to a page where all your recent
Status Update appears and a Submit Button at
the Front of each of the Updates, Just click on
the submit button the guess what? Go check the
facebook update you would have gotten up to 150
Likes, Just keep pressing submit button to have
more likes and gain popularity. .lol those girls go
think say you be celeb.

Go to link download
Thursday, May 18, 2017
IS YOUR BLACKBERRY SLOW MAKE IT FASTER BY DOING THIS
IS YOUR BLACKBERRY SLOW MAKE IT FASTER BY DOING THIS
Have you ever wonder why your Blackberry phone
is slow and sometimes freeze? Well, The Simple
truth is "Every Action, Process on your Phone is
Logged". You check Mail, Use Facebook, Chat on
Facebook, Use BBM, Yahoo! Messenger, Twitter,
All this Processess are logged in the Blackberry
Event Logs.
Once the Saved Logged hit some certain levels, It
tells on the Phone and then it begins to Slow
down the RAM of the Phone, The Simple Solution
is to clear the Event Log Register and Free your
Phone from any unneccessary behaviour.
FOLLOW THIS STEPS TO CLEAR YOUR PHONE
EVENT LOG
1. Hold down the ALT key and press LGLG (the
letters) while on your Home screen.
2. You will have to wait a bit while your Phone
loads, You will see your event logs.
3. Now, Click the Blackberry menu button and
select " clear log " this will clear your Phone Log
and keeps your phone working 100% faster!
It works perfectly!!!
Dont Forget to Click on the Share, Like & Tweet
button if you Appreciate this Post.

Go to link download
How To Reset Your Andriod Phone – 2 Working Options
How To Reset Your Andriod Phone – 2 Working Options
This Tutorial will put an End to your Andriod Phone Issues.. Read Along. If you’re at your wit’s end with your phone, screaming at it when it takes 10 minutes to start an app, it may be time for a factory reset. A factory reset will erase all of your phone’s data and restore it to the settings that it came with out of the box. Before you throw your phone in the trash, check out this guide. Method One: Resetting A Working Device 1. Open your device’s Settings. The Settings app can have varying icons depending upon on your specific device, and may be also be found within the App Tray or by pushing 2. The phone’s dedicated menu button. Find your Factory Reset option. Depending on your device, the “ Factory data reset” feature may be located in one of two sections within the Settings app: Select the “Privacy” settings, and scroll down to “Factory Reset” OR Select the “Backup and Reset” settings, and scroll down to “Factory Reset” 3. Tap “Reset Device” to delete all data and restore your device’s factory settings. The accounts that you are signed into will be displayed on the screen. By default, all of your phone’s internal storage will be wiped. Note:- If you want to erase all of the data on your phone’s SD card as well, check the box at the bottom of the screen. 4. Confirm the process by selecting “Erase Everything“. This will delete all data and restore back to your device’s factory settings. Your phone will be as if it just came out of the box Method Two: Resetting A Non-Booting Device 1. Power down your device. Before you begin the reset procedure, you will need to completely power your device off. If it is frozen, you can pull the battery out to turn it off. 2. Press and hold the recovery buttons. The buttons vary from device to device, so you may need to look up the instructions for your particular phone. You will need to press and hold the buttons for a few seconds. Some of the more common button combinations include: Volume Up + Home + Power Volume Down + Power Home + Power If none of the above work, Do a Google Search for your phone’s model plus “recovery mode” e.g Google Search for Samsung SII Recovery mode. 3. Select Factory Reset. Once the recovery menu opens, you can navigate the menu with the volume buttons. You may need to open the Recovery menu to find the Factory Reset mode. Use the Power button to select your menu options. You will be asked to confirm the factory reset. 4. Wait for the restore process to compete. After your phone resets, it will be set back to factory defaults and will be like it just came out of the box. Hope this Tutorial helps? Drop your Comment.
Go to link download
Monday, May 15, 2017
Make Your Download 10x Faster on Android With ADM Pro
Make Your Download 10x Faster on Android With ADM Pro
Hello friends let’s do some little tutorial. Internet download manager (IDM) has helped a lot of PC users in many ways. IDM is powerful software that allows you download any flash video from any website E.g. YouTube and lot more It’s also increase your download speed 10x faster than your normal download speed. If you have a pc and you are not using IDM, then you are long way far from home. And if your IDM key have expired, just request for a universal key and it will be forwarded to you.
Here comes ADM (Advance Download Manager) works more like IDM. ADM makes your downloading 10x faster. I recommend it as one of the best download manger on android. You can resume your pause files and also restart them. It helps you detect downloading files from your browser.
The good news is that with ADM, you can download anything downloadable on showbox, and any other TV box you are using.

Advanced Download Manager Pro features:
– download up to three files simultaneously;
– accelerated download by using multithreading (9 parts)
– interception of links from the browser and clipboard;
– icon of the program and downloading progress in the notification panel;
– backup list of downloads and settings on SD card;
– completion notification by sound and vibration;
– resume after reconnection or program restart;
– save different file types in different folders;
– built-in browser for sites with registration;
– plan files download on a schedule;
– widget on your home screen;
– site manager;
– NO ADS
… PLUS MUCH MORE.
Where Can I download it?
You can download ADM Pro V5.1.1 here
The bad news is that you cannot download YouTube videos with it under Google rules. So you know where to go to download YouTube videos with the word magic.
Go to link download
Wednesday, May 10, 2017
HOW TO BYPASS ADMINISTRATIVE ACCOUNT ON YOUR PC IN 2013
HOW TO BYPASS ADMINISTRATIVE ACCOUNT ON YOUR PC IN 2013
1. Simply accessing Unprotected Administrator Account.

Procedure 1: Goto Start --> Control Panel --> User Accounts.. Now select the account whose password u want to reset.
Procedure 2 : Follow the Next method i.e hacking password through Net User Command.
Go to link download
Tuesday, May 2, 2017
Now You Can Hide Your Last Seen Time Whatsapp For Android Has New Privacy Settings
Now You Can Hide Your Last Seen Time Whatsapp For Android Has New Privacy Settings
WhatsApp just got better after it was acquired
few days ago by Facebook for just $19
billion.WhatsApp has finally released a new
update for Android which brings the much
awaited privacy settings that enables you to
customize WhatsApp the way you want it.
The new update brings new Privacy options
under Account section in Settings. Now, you can
finally hide your " Last Seen", "Profile Photo"
and "Status" from anyone. This has nothing to
do with downloading an app on play store to
hide your last seen TimeStamp but originally
coming from them.
Using the new privacy feature, you can allow
everyone to see your personal info (last seen,
profile pic and status) or only your contacts or
nobody.
No more any duke and harry stalking your last
appearance on WhatsApp or whatsoever.
This new WhatsApp update is not yet available
on the Google Play Store, but you can download
the new WhatsApp v2.11.169 update APK file
from the official WhatsApp website. http://whatsapp.com
Sent from @jimohib....Follow on twitter.
Go to link download
Saturday, April 29, 2017
HOW TO AUTOMATICALLY STEAL FILES FROM ANY USB DEVICE ON YOUR PC WITHOUT THE USER KNOWING
HOW TO AUTOMATICALLY STEAL FILES FROM ANY USB DEVICE ON YOUR PC WITHOUT THE USER KNOWING
WARNING:- This Tutorial is not for Criminal Act
but for Educational Use only and How to Stop it
so you wont Fall a Victim.. Always Encryt and
Password your Files on any USB Device.
USBdumper runs silently as a background
process once started and copies the complete
content of every connected usb device to the
system without the knowledge of the user. It
creates a directory with the current date and
begins the background copying process. The user
has no indication that the files stored on the USB
device are copied from the USB. The only
indication to find out is to find the process listed
in the Windows Task Manager or a third party
process manager, or to accidentally stumble upon
the directory the files are copied to.
Just imagine this tool running on a public
computer with no access to the task manager or
a software like process explorer. You would not
know that the files are copied. What could you do
to protect against this program? You could
encrypt your data, if you use a tool like true crypt
for example. Even if the files are copied they are
useless unless the �attacker� knows your
passphrase.
The files are automatically stored in the directory
the program is started in. Depending on the size
of the drives that get connected to the PC,
enough storage space needs to be available on
the drive the program is executed from.
If youve been Eyeing Some files on a Particular
USB Device, Just Plug it to your PC even in Front
of the Owner and your Laptop vs USBdumper will
get the Job Done for you.
Want USBdumper? Download Here or Here
Note:- [Ignore the Warning if your Anti-Virus
detect it as a Malware, Its 100% Safe].
Enjoy!!!! Hit the Like Button if you Like this Post.

Go to link download
HOW TO CONTROL YOUR PC LAPTOP WITH YOUR EYES USING
HOW TO CONTROL YOUR PC LAPTOP WITH YOUR EYES USING
Technology at its Peak! Programmer are not
relenting, Providing Sophisticated Software to
perform Unimaginable task.. Today, We will be
talking on a Software that allow you Control your
PC with your eyes. *wink*
We shall be making use of a Software called
eViacam , This software only use your PC webcam
and your face motion to control computer or
laptops mouse icon, So you dont have to make
Use of your Laptop Mouse anymore.
Materials Required:-
1. A Laptop or PC With WebCam or an Attached
Cam.
2. eViacam software Installed on your PC
[Download Here]
HOW TO USE eVIACAM TO CONTROL YOU PC
WITH YOUR EYES
Enable Viacam more popularly called by eViacam
is a mouse replacement software that can move
the mouse pointer by using eye. It works on a
standard PC equipped with a webcam. No
additional hardware is required.
The first time you install and configure your
webcam before using eViacam.
Its important to configure your camera to
manual exposure mode and adjust this parameter
to get around 25 fps or more.
Most modern camera scan deliver 30fps. Please
check your webcam manually if needed. Once
installed open eviacam automatically detect the
camera. Place the camera toget a frontal view of
your face.
The width of your face in the picture should be
one-third of the width of the frame. Focus
tracking box around the face.
Turn on tracing of the file menu. Try moving your
head and see the results. You should be able to
reach all areas of the screen with the mouse
pointer.
To click just stop pointing your Finger to the
desired position. In a few moments click will be
generated automatically.
You can use the window at the top of the screen
to select different Modes of clicks.
Enjoy!!!

Go to link download
Friday, April 28, 2017
How to Make Your Own Dynamic Wallpaper Creator For iPhone iOS 7 Jailbreak Using Adobe Photoshop
How to Make Your Own Dynamic Wallpaper Creator For iPhone iOS 7 Jailbreak Using Adobe Photoshop

Version: 1.6.2.2 Size: 865 KB Required: Android 3.0 and up Developers: Rob J
Overview:
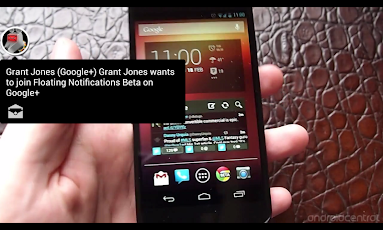
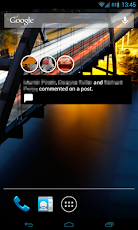
Get to grips with everything Floating Notifications
The trial will give you a full 30 days to get to grips with everything Floating Notifications has to offer. Once your ready, this unlocker will give you unlimited access to the full Floating Notifications experience!!
==========
Themes
Themes for FN can be found both on the Play Store (search "FN Theme") or on XDA
Any issues, requests or suggestions?
========
App issues?
for known issues or bugs. If that doesnt help, get in touch :)

Version 1.3
- Added some security settings
APP SCREENSHOTS


- 5 Links Available to Download
- Download 1
- Download 2
- Download 3
- Download 4
- Download 5
Go to link download
Thursday, April 20, 2017
Posting your blog posts to Facebook automatically 2014
Posting your blog posts to Facebook automatically 2014
There are several applications you can use to feed blog posts to Facebook. Each one displays the posts on your page’s wall, so that everyone that ‘likes’ your page will also see your posts in their newsfeed. Some tools provide the option to create a separate ‘Blog’ tab on your page and some allow people to subscribe to your blog and give you user statistics.
 Why should I add my blog posts to Facebook?
- Increase your readership. Facebook will increase the number of people who see your blog posts.
- Maximise your effort. Automating the process saves you time.
- Adds more content to your Facebook Fan Page.
Before You Begin
Some considerations before setting up:- Will you be sending too much content to your Facebook page? Having too much automated content can look lazy and might cause people to ‘unlike’ your page if you crop up too much in their newsfeed. If you publish blog posts frequently (3 times a day or more) then think about this next point.
- What kinds of blog posts do you want to appear on Facebook? It can sometimes make your page look less appealing if all the information on your wall has come from one place. Instead, you could choose to tag certain blog posts with a ‘Facebook’ tag and just send the feed for that tag to your Facebook page. You could use this alongside Facebook’s link, video and event sharing features so not all content comes from your blog.
- How much of your blog posts do you want to show on Facebook? If you want to direct readers away from Facebook to your actual blog then you don’t really want them to be able to view complete posts within Facebook; perhaps just a title and a snippet of text.
Methods for Adding Your Blog Posts to Facebook
1) Facebook NotesFacebook’s in-house blogging application. Works reliably with no branding/marketing but does display the posts in their entirety. Generates an RSS feed which people can subscribe to outside of Facebook. No stats on subscribers but interactions with Notes within Facebook is reported via Facebook Insights. Probably the biggest downside is that you can only import one RSS feed into Facebook notes.
- Log in as your page (Account > Use Facebook as page)
- Go to www.facebook.com/notes.php
- Click ‘Edit import settings’
- Type in full URL of blog RSS feed
One of the applications we currently use on the IBJTech Facebook page. Getting it set up is a fairly complex process but once this is done it seems to work really well. Allows people to subscribe both within Facebook and externally and provides stats on subscribers. Creates a ‘Blog’ tab on your page but doesn’t display full posts – all links take users to your blog itself. Option to post blog to Twitter too. Facebook posts contain some branding.
Whilst all of these applications display one image included in your blog post, Networked Blogs can display a small screenshot of your blog with any posts that don’t contain images which can ensure your blog posts always look a bit more appealing and eye-catching.
- Visit apps.facebook.com/blognetworks/
- Click ‘Register a blog’ and follow the on screen instructions carefully
- It helps if you are the author/owner of the blog (otherwise you have to request permission the register it)
- Repeat for each blog you want to post on Facebook
Similar to Networked Blogs in that you can feed more than one blog (or other RSS sources such as social bookmark feeds) to your wall with some branding and just a snippet of each post. However there’s no option for users to subscribe directly and getting set up is fairly complicated.
The ‘Wallpaper’ tab it creates is a nice idea and can be used as an effective Welcome page or landing tab. It groups and displays your statuses, shared links, featured blog posts and friends’ updates, but it can be glitchy and isn’t particularly well designed.
- Visit apps.facebook.com/rssgraffiti/ and follow the instructions
Similar to Networked Blogs and RSS Graffiti but benefiting from a quicker and easier set up and subscription options. However, posts are very long and contain lots of unnecessary ‘meta-data’ (publish date, source of feed etc.) and promotion of Social RSS’s other services.
There can sometimes be a significant delay between posting on your blog and the post appearing on Facebook. However this app is stable enough to be a good beginner’s option.
- Visit apps.facebook.com/social-rss/tabsettings.php
- Select your Facebook page in the ‘Quick Select’ menu
- Fill out the online form with your feeds and desired settings
The third party application developer Involver make a wide range of free Facebook applications including an RSS app which you can use to feed your blog to Facebook, a Twitter app which displays your Twitterfeed in a separate tab, a Flickr app, document viewer which lets you display PDFs, Word Docs and spreadsheets on Facebook and Youtube app. Well worth checking out.
Go to link download
Wednesday, April 12, 2017
10 Common Mistakes That Could Damage Your Laptop A Must Read
10 Common Mistakes That Could Damage Your Laptop A Must Read
Laptops are very important work and fun
stations. To ensure that our laptops lasts
us longer, it is our duty to know the safe
practices, how to, habits, acts, and
behaviors that might cause us to lose our
laptops.
Here are 10 common mistakes that might cause
you to damage your laptop or computer.
1. Using Your Computer Without An
Antivirus
Getting a good antivirus with paid license could
be expensive but it's always a wise choice to do
so. Using your laptop without an antivirus
software installed could cause you the
following;
* Slow system performance
* Loss of important documents exposure to
h*ckers through the installation of Trojan horses
and tracking cookies on your system
* And finally could cause total system failure
To avoid the above consequences, get a good
antivirus program for your laptop.
Note: Though Antivirus program is essential for
your system safety, you should not install more
than one antivirus program on your system at
the same time.
2. Lifting Your Laptop By The Screen
One common mistake people often make is;
lifting their laptops by the screen, therefore
exerting too much pressure on the laptop
hinges, and increasing the risk of losing your
laptop screen. Always grab your laptop by the
base and not by the screen.
3. Blocking The Air Vent
Blocking the air vents helps the system cool by
serving as a means for the system to dissipate
heat. If you block these vents by placing a pile
of papers that block the vents for example, your
laptop would overheat causing problems that
could make you lose your laptop to damage.
Always ensure that you don't block your laptop
vent to prevent overheating and damage to your
laptop. The air vents on your laptop.
4. Using Your Laptop Without Surge
Protection
Using your laptop without surge protection could
cost you your computer. Every now and then
power fluctuates and spikes which could cause
damage to your power pack or your laptop.
Ensure you get a good surge protector to protect
your laptop and accessories from power surges.
5. Eating & Drinking When Using Your
Laptop
Most times we want to enjoy food and drinks
while watching movies or playing games on our
laptop. Sounds like fun but is probably one of
the most dangerous mistakes you could make,
as an accidental spill of a cup of juice or water
on your keyboard could cause the system to
short circuit and could cause your laptop to burn
or shut down indefinitely. Always keep liquids
far away from your laptop.
6. Using Your Laptop On Bed Or Soft
Surfaces
Most people enjoy the comfort of working with
their laptops on bed. However, this is bad
practice. Using your laptop on bed could cause
your laptop to overheat
7. Over Charging Your Laptop Battery
Overcharging your laptop could cause your
battery to wear out. When your laptop attains
100% charge, take it off the power source. This
is important because when you work with a
laptop with a bad battery and there is an
unexpected power cut, your system could go off
immediately causing your system to shut down
wihtout saving your previous session. This could
cause you to lose your unsaved document and
could eventually lead to the damage of your
system.
8. Moving Your Laptop With Your Power
Cord Aattached
When moving your laptop from one point to
another, it is dangerous to do so with your
power cord attached as it might get tangled up
and cause the laptop to fall off your hands.
Always detach the power cord first before
moving your laptop
9. Using Your Power Cord To Obstruct The
Way
It is dangerous to charge your laptop in a way
that your power cord obstructs the way.
Someone could accidentally kick your cord fit
such a force that could spoil your power cord or
cause your laptop to fall to the ground. Always
place your cord where it doesn't obstruct the
way.
10. Never Open Your Laptop If You Are Not
A Technician
Some folks might be tempted to open their
laptops to see if they can try their hands on
fixing a problem or two. The truth however is, no
matter how small you perceive the problem to
be, if you are not a technician or have concrete
knowledge about your computer hardware, do
no open your computer, doing so could stand
you the risk of tempering with other things
which could spoil your laptop totally. Always
seek technical help when having issues with
your computer, don't do try and error.
#Enjoy!!!
Sent from @jimohib....Follow on twitter.
Go to link download
Monday, April 10, 2017
Steps To Take To Make Your PC Run Faster
Steps To Take To Make Your PC Run Faster
Its just tips anyway. They worked for me and it might for you too.Have been Receiving differet Messages from Some Users on How to Make their PC run Faster.... Follow the Steps Below to Make your PC run Faster. 1. Make sure you update your system regularly via windows update. 2. Download Latest drivers for your system. 3. Download Pimping softwares like Advance System Care, Tuneup utilities and d rest of them. I would strongly recommend Advance System Care 4. Update your antivirus database and definition at least once in 2 weeks. Enjoy your PC
Go to link download
Saturday, April 8, 2017
Best Way to Protect Your USB Drive Device
Best Way to Protect Your USB Drive Device

Size: 400 kb
Requirement: Windows Vista or newer with (.NET Framework 2.0)
- Download the file from the link below and unzip it.
- Open UnHidesetup.exe with Administrator rights otherwise it will give error.
- Click on Install USB Unhide .
- You’re done! Enjoy!!


Unhide.zip [v1.0] [400 KB] / Mirrors
Go to link download
Friday, April 7, 2017
Your Computer calls your name after Boot Trick
Your Computer calls your name after Boot Trick
Do you watch movies? Have you always loved the way how Computers in movies welcome their users by calling out their names? I bet that you too would want to know how you can achieve similar results on your PC and have a computer said welcome.
Then you are at the right place, this article describes exactly how you can make your computer welcome you like this.
With this trick, you can make your Computer welcome you in its computerized voice. You can make your Windows based computer say "Welcome to your PC, Username."
Make Windows Greet you with a Custom Voice Message at Startup
To use this trick, follow the instructions given below:-
- Click on Start. Navigate to All Programs, Accessories and Notepad.
- Copy and paste the exact code given below.
Dim speaks, speech3. Replace Username with your own name.
speaks="Welcome to your PC, Username"
Set speech=CreateObject("sapi.spvoice")
speech.Speak speaks
4. Click on File Menu, Save As, select All Types in Save as Type option, and save the file as Welcome.vbs or "*.vbs".
5. Copy the saved file.
6. Navigate to C:Documents and SettingsAll UsersStart MenuProgramsStartup (in Windows XP) and to C:Users {User-Name}AppDataRoamingMicrosoftWindowsStart MenuProgramsStartup (in Windows 8, Windows 7 and Windows Vista) if C: is your System drive. AppData is a hidden folder. So, you will need to select showing hidden folders in Folder options to locate it.
7. Paste the file.

Now when the next time you start your computer, Windows will welcome you in its own computerized voice.
Note: For best results, it is recommended to change sound scheme to No Sounds.
You can change the sound scheme to No Sounds by following the steps given below:-
- Go to Control Panel.
- Then click on Switch to Classic View.
- Then Click on Sounds and Audio Devices.
- Then Click on the Sounds Tab.
- Select No Sounds from the Sound Scheme option.
- If you wish to save your Previous Sound Scheme, you can save it by clicking Yes in the popup menu.
- Click on OK.

Try it yourself to see how it works. In my personal opinion, this is an excellent trick. Whenever I start my PC in front of anybody and the PC welcomes me, the fellow is left wondering how brilliant a computer do I have.
Go to link download
Thursday, April 6, 2017
How to Convert Your Airtime to Physical Cash
How to Convert Your Airtime to Physical Cash
A lot of you might have been looking for a convenient way of exchanging your airtime for real cash for a very long time but seems to find none. Don’t panic, you can now exchange your airtime for real cash. All the Airtimeyour Bros and Sist has been sending you need not go for calls alone; you can convert it to cash. The N5,000 you earn from MyAds can be converted to cash and it will be
deposited in your bank account. All the airtime boo has been sending bae need not go for unnecessarily calls; you can simply deposit it in your bank account.
How Can I Convert my Airtime to Cash?
Zoranga is a platform that gives you opportunity to convert airtime to cash. It allows you to Fund any account in Nigeria without visiting the bank. As well you can send money to any Zoranga account. It is one of the simplest ways to send money to a love one or fund your bank account without visiting your bank account.
No Bank required, No ATM required… Just your Airtime!
This is Why You Should Make Use of Zoranga
>>You can deposit money into your bank account with your Airtime
>>You can send money to your love ones with your Airtime
>>You can allow friends to make donation to you via social media
>>You can even become an agent with Zoranga.
How Can I Join?
Visit www.zoranga.com and sign up, after you sign up, you can follow the rest steps in setting up your account.
It is simple. It is better and a life saver.

Go to link download
MSI ACCESS POINT TURN YOUR LAPTOP INTO A WI FI WIRELESS HOTSPOT REVIEW
MSI ACCESS POINT TURN YOUR LAPTOP INTO A WI FI WIRELESS HOTSPOT REVIEW
turns your MSI laptop into a Wi-Fi wireless
accesspoint. So anyone nearby can surf the
Internet through your sharing.
Also, your iPhone, PDA, mobile or whatever Device
can Share Connection with your Laptop, They can
enjoy the Internet by connecting to the wireless
network broadcasted by it.
This is a Perfect Replacement for Connectify,
Connectify is cool too but due to Upgrade
Problem, Many People are not Using it.
Now, Just Connect your Modem to your PC,
Connect to the Internet, ON MSI Access Point and
Share your PC Connection with your iPad, iPhone,
Mobile Phone, Other PC and Other Devices.

#Enjoy!!!
posted from Bloggeroid
Go to link download